
Jeans knees take more friction than almost any other part of your wardrobe. Between kneeling on garden soil, sitting cross-legged on the floor, and the natural bending of your joints through thousands of daily steps, the horizontal weft threads in denim snap while the vertical warp threads thin out into a pale web. Sashiko, a Japanese folk embroidery method that originated in rural farming communities during the Edo period, offers a durable way to rebuild this weakened fabric rather than throwing the trousers away.
Traditional sashiko relies on a simple running stitch worked in geometric patterns with heavy-twist cotton thread. Applied to modern denim, it acts like structural rebar, bonding a reinforcement patch behind the blowout while locking raw, frayed edges flat against the leg. The resulting repair does not hide the damage. Instead, it turns the tear into a patterned, textured record of wear that will hold up through several more years of wash and wear.
Assessing the Tear and Cutting the Backing Patch
Before cutting any cloth, turn the jeans inside out and lay the damaged leg flat on a hard work surface. Inspect the denim at least 5 centimeters beyond the visible edges of the hole in every direction. When knees blow out, the fabric surrounding the void is almost always worn thin, even if the threads have not completely broken yet. If you stitch a patch only across the open hole, the strain will tear the tired denim along your stitch line during your very next squat.
Select a backing fabric that shares a similar weight and fiber content to your jeans. A medium-weight woven cotton, such as a 6-ounce cotton twill, an unbleached linen canvas, or scrap denim from an old pair of 10-ounce jeans, works best. Avoid synthetic stretch fabrics like polyester knits or elastane blends, as they behave unpredictably under thread tension and stretch out while the denim stays rigid. If your jeans have two percent elastane, an unwashed non-stretch cotton backing will stabilize the blow-out area and prevent the hole from growing wider.
| Jeans Weight | Recommended Backing Fabric | Backing Weight | Thread Choice |
|---|---|---|---|
| Lightweight (9 to 11 oz) | Cotton broadcloth or chambray | 4 to 5 oz | Fine sashiko thread (single ply) |
| Standard (12 to 14 oz) | Cotton drill or lightweight duck canvas | 6 to 8 oz | Medium sashiko thread or size 8 perle cotton |
| Heavyweight (15 oz and above) | Salvaged vintage denim or heavy twill | 9 to 10 oz | Heavy sashiko thread or dual-strand medium |
Cut your backing patch into a soft rectangle or oval that extends 4 to 6 centimeters past the thinning borders of the tear. Rounding the corners of the patch with your fabric shears prevents sharp points from curling, catching on your toes when you pull the jeans on, or peeling back inside the leg over time. Cut the patch along the straight grain of the fabric so that its grain aligns with the vertical weave of your jeans leg.
Basting the Backing Fabric in Place
Turn the jeans right-side out again. Slide a wooden sleeve board, a thick cutting mat, or a rolled magazine wrapped in scrap paper into the pant leg directly under the knee. This insert prevents you from accidentally stitching through both the front and back panels of your jeans leg, an annoying accident that happens more often than most menders care to admit.
Slip the backing patch through the knee hole, working it inside the leg until it sits centered directly beneath the tear. Smooth out all ripples and puckers with your fingers, working from the center toward the outer perimeter. The patch must sit completely flat against the inside of the denim without pulling the leg fabric taut or letting it bunch up.
Pinning denim can warp the leg fabric and cause needles to snag, so basting with temporary stitches provides a far more stable base for sashiko. Thread a standard hand-sewing needle with bright sewing thread that contrasts with both your jeans and the patch. Secure the patch using broad basting stitches:
- Begin in the center of the patch, stitching outward toward the edges in an asterisk or starburst pattern.
- Run a perimeter of wide basting stitches roughly 1 centimeter inside the outer edge of the backing patch.
- Leave the stitches loose enough that they do not dimple the denim, but firm enough that the backing cannot slide sideways when handled.
- Tie off the basting thread with simple knots that you can easily snip and pull free once the permanent sashiko stitching is finished.
Marking Stitch Grids with Tailor Chalk
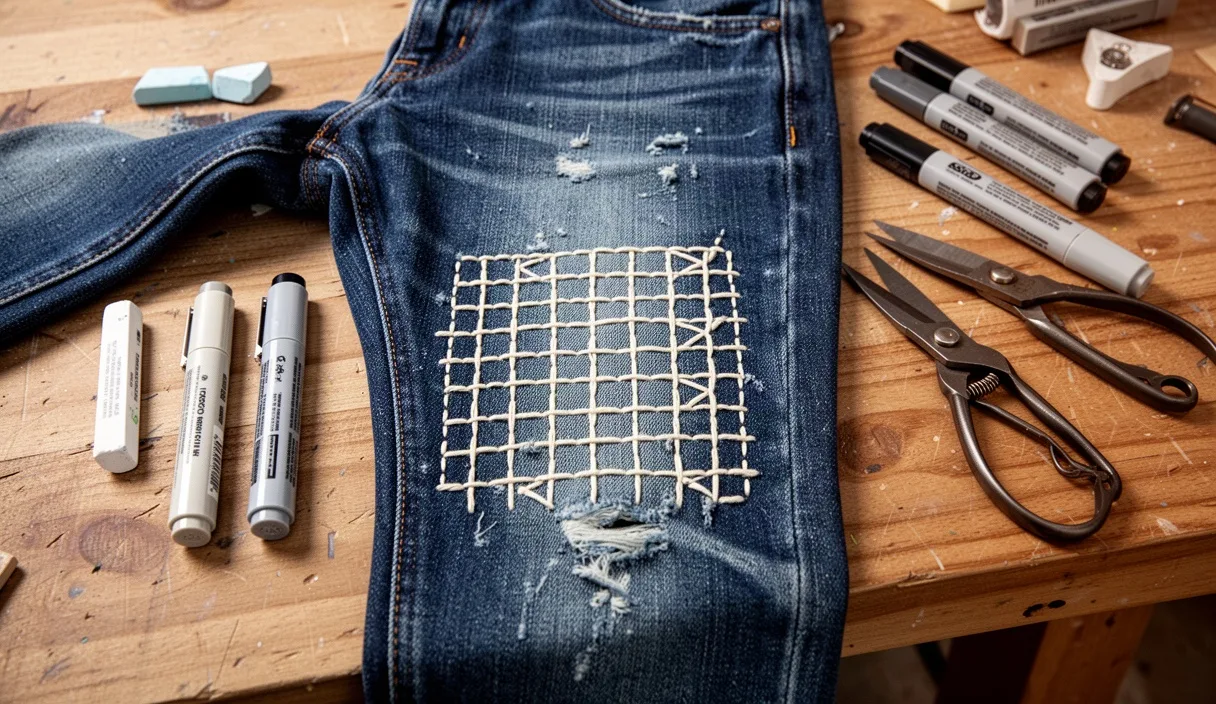
Sashiko looks best when the stitches follow an orderly geometric structure. While freehand repair has rustic charm, an even grid keeps tension balanced across the knee so the repair flexes naturally when your joint moves. The two most reliable patterns for knee reinforcement are juji zashi (cross stitch grid) and tate-jima (parallel vertical lines spaced closely together).
Use a clear acrylic ruler and a sharpened triangle of tailor chalk, a chalk wheel, or a water-soluble fabric pen to draft your guidelines directly onto the denim knee. Avoid standard graphite pencils, wax markers, or permanent ink pens, which bind stubbornly to cotton fibers and refuse to wash out of indigo cloth.
Draw horizontal and vertical lines across the entire repair zone, extending 2 centimeters beyond the basting line. For standard denim repair, a grid spacing of 5 millimeters or 7 millimeters produces an ideal balance between flexibility and structural hold. If the grid lines are drawn closer than 3 millimeters, the sheer density of the thread can turn the knee into a stiff, cardboard-like plate that will not bend comfortably when you walk.
If you prefer a simpler pattern of parallel lines, orient them vertically. Knee denim stretches horizontally as the leg bends. Vertical stitching reinforces the snapped horizontal weft while allowing the natural horizontal give of the pant leg to survive without snapping your sashiko thread.
Working the Running Stitch Without Puckering
Sashiko requires specific tools: a stiff, long sashiko needle with an eye large enough for thick thread, and genuine matte sashiko thread or size 8 perle cotton. Standard polyester machine thread is too sharp and will cut through aged denim fibers under friction, while stranded embroidery floss separates, fuzzes, and breaks when rubbed against rough surfaces.
Cut a strand of sashiko thread about 50 centimeters long. Longer strands will twist, knot, and weaken from repeated friction as they pass through two layers of heavy fabric. Thread your needle and knot the end with a small figure-eight knot. Work with a palm thimble, which sits in the hollow of your hand near the base of the middle finger, allowing you to push the needle through multiple folds of denim using your arm muscles rather than finger pinch strength.
To avoid puckering, load several stitches onto your needle before pulling the thread through. Gently pleat the denim onto the needle point in an accordion motion, gathering four to six stitches on the shaft. Push the needle through with your palm thimble, pull the thread along, and then smooth the gathered fabric flat with your fingers before setting the tension.
Establish a steady rhythm with the spacing: in traditional sashiko, the stitch on the surface of the fabric should be slightly longer than the gap left on the underside. A ratio of roughly three parts visible stitch to two parts hidden gap creates a strong, balanced appearance. Keep the following practices in mind as you work:
- Never pull the thread tight. Leave a tiny bit of play in the thread along the underside so the jeans can flex.
- When reaching the end of a line, leave a small loop of slack on the backside before pivoting and heading down the adjacent line.
- Stitch through all loose, fraying denim weft threads at the center of the blowout, tacking them directly to the backing patch to stop further unraveling.
- If your fabric begins to wave or bunch, pause and stroke the panel outward toward the side seams with the heel of your hand to restore flatness.
Securing Thread Tails Inside the Pant Leg
Bulky knots inside a pant leg create pressure points that rub against your kneecap and cause skin irritation. Managing your starting and ending threads cleanly ensures both personal comfort and long-term durability for the repair.
Instead of finishing a thread run with a thick tailor knot, use a traditional friction anchor. Push your needle through to the underside of the work. Weave the needle horizontally through the back of three or four existing sashiko stitches, alternating over and under without catching the front surface of the denim. Turn the needle 180 degrees, skip one thread strand, and weave it back through those same stitches in the opposite direction. This double-back weave creates enough friction within the cotton fibers to lock the thread permanently without any knot at all.
Trim the remaining thread tail to roughly 1 centimeter. Leaving a short tail prevents the thread from backing out during the first few wears; trimming it flush to the stitch line risks unraveling if the fabric shifts. If you prefer to start a line without a knot, you can use the same technique: make three small running stitches in reverse along your grid line, then stitch forward directly over top of them.
Once all grid rows are finished and every thread is woven off, carefully snip the bright basting stitches you placed earlier and gently pull them out of the denim. Check the interior of the pant leg with your bare hand to ensure no hidden pins, loose loops, or rough knots remain against the knee area.
Laundering Stitched Denim to Settle the Fibers
Fresh sashiko stitches sit slightly proud on the surface of denim, and the grid markings will still be visible. A proper wash cycle settles the repair, swelling the cotton threads so they sink into the weave of the jeans and lock with the backing patch.
Soak the repaired jeans in a basin of cool or lukewarm tap water for 20 minutes to dissolve tailor chalk or water-soluble ink. Agitate the knee area gently with your fingertips to help the chalk break away from the fibers. Avoid aggressive scrubbing with brushes, which can fuzz the newly laid sashiko thread before it has had time to bond with the surrounding denim.
After the chalk has washed clean, run the jeans through a standard washing machine cycle using mild detergent and cold water. Skip chlorine bleach and liquid fabric softeners. Softeners coat cotton fibers in a lubricating silicone film that weakens the friction holding unknotted sashiko thread ends in place. Turn the jeans inside out before placing them in the drum to protect the fresh stitches from snagging on zippers or agitators.
Air-drying is the best choice for newly repaired denim. Hang the jeans by the hem or lay them flat on a drying rack away from direct, harsh sunlight. High machine-dryer heat can shrink your patch fabric at a different rate than the worn exterior jeans, creating ripples and puckers that cannot be ironed out. Once the fabric is completely dry, press the knee from the inside using a warm steam iron, which will flatten the stitches into a smooth, flexible plane.
Common Mistakes to Avoid
Even practiced needleworkers encounter a few predictable stumbling blocks when working on heavy indigo denim. Keeping an eye out for these errors will save you time and unpicking:
- Patching too small: Trimming the backing fabric to match the exact hole leaves nothing for the running stitches to anchor into except weak, disintegrating yarns. Always overshoot the tear boundaries by at least 4 centimeters.
- Excessive thread tension: Pulling each stitch firm like you are sewing a button creates an immediate accordion ripple in the pant leg. The thread should lie completely neutral against the denim.
- Using standard sewing thread: All-purpose polyester thread is far too thin. It will disappear into the denim weave and eventually saw through the knee fibers under heavy tension.
- Skipping the sleeve board: Basting or stitching through the entire leg is a frustrating mistake that requires carefully cutting out your stitches and starting over. Always keep a physical barrier inside the leg.
Next Steps for Long-Term Denim Care
With your first sashiko knee repair complete, take a few minutes to inspect the rest of the jeans. Blowouts rarely travel alone; look closely at the crotch seam, the back pockets, and the rear hems where the cuff strikes your shoes. Identifying thinning areas early allows you to apply a backing patch and running stitches before the cloth splits wide open, which takes half the time of rebuilding an open hole.
If you find that your sashiko repair feels slightly stiff on the first wear, wear the jeans around the house for an afternoon. Body heat and normal movement soften both the cotton sashiko thread and the twill backing, allowing the repair to mold to the bend of your leg. If structural seams along the outseam or inseam ever begin to separate under heavy strain, or if you encounter structural damage to the waistband, consult an experienced denim tailor who has the specialized chainstitch machines necessary to repair high-stress garment joins.