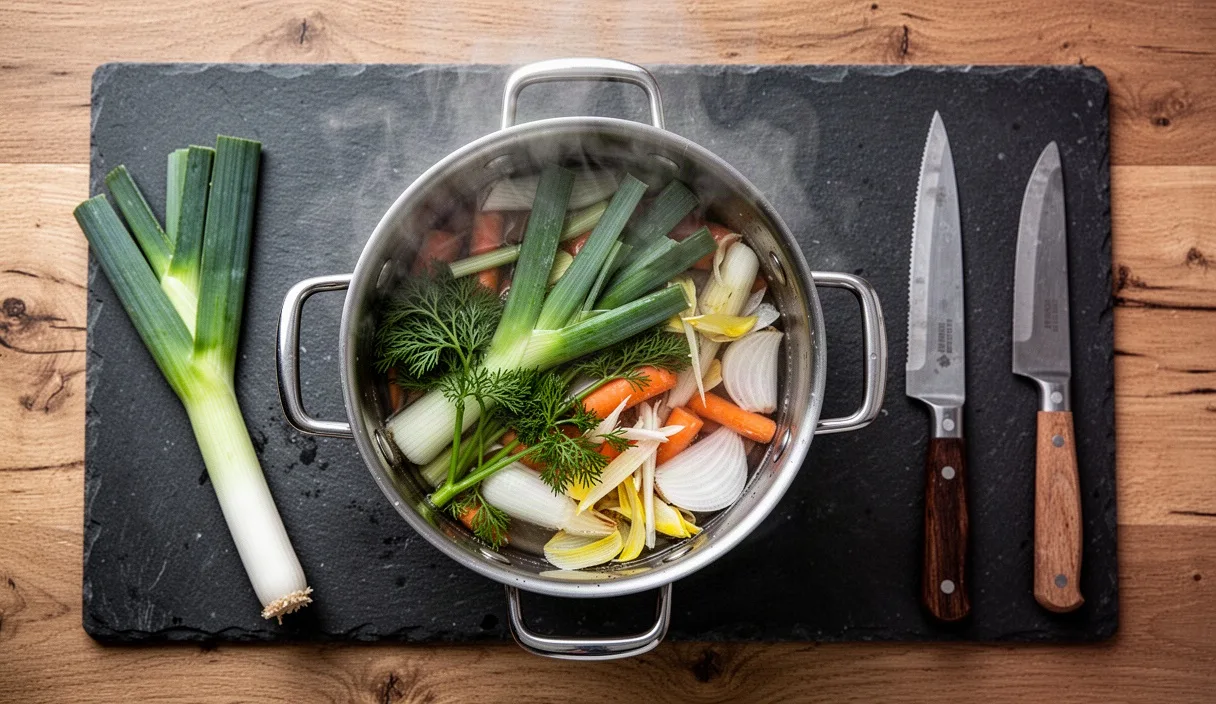

Every home cook encounters the same daily dilemma at the cutting board: the mound of carrot peelings, leek greens, and onion tops that seems too substantial for the trash, yet not fit for dinner. Tossing them into a freezer container instead of a trash can is one of the simplest shifts you can make toward a zero-waste kitchen. Over the course of a few weeks, these humble trimmings collect into a fragrant, cold brick of ingredients waiting to be simmered into rich vegetable stock.
The trouble begins when enthusiasm outpaces culinary chemistry. While making stock from scraps feels thrifty and intuitive, not every plant trimming produces clean, savory flavors when simmered in hot water. A single stray handful of broccoli stems or a bitter cabbage core can turn several liters of broth into cloudy, sulfurous water that ruins a pot of soup. Knowing precisely what goes into your scrap bag and what stays out makes the difference between a golden kitchen staple and kitchen compost gone wrong.
Managing the Freezer Scrap Container
Successful stock making starts with kitchen logistics. If collecting trimmings feels cumbersome or messy, the habit rarely lasts past a week. Choose a dedicated, airtight container that fits neatly in your freezer and allows you to add items gradually without letting in excessive air. Gallon-sized silicone bags, sturdy food-grade plastic tubs with flexible lids, or wide-mouth glass jars work well. If you use glass, leave at least two inches of empty headspace at the top, because frozen matter expands and can crack rigid containers.
Cleanliness is the most overlooked factor in scrap collection. Stock extracts everything water can dissolve, which includes soil particles, grit, and lingering surface wax. You do not need to scrub every vegetable until it shines, but you must rinse raw ingredients before trimming them. Trim off damaged or slimy spots, and never add scraps that spent the afternoon sitting on a dirty counter. A safe guideline is simple: if you would not eat the vegetable cooked in a stir-fry, do not toss its trimmings into the broth bag.
Pack the scraps tightly into your container as you work. Air pockets encourage freezer burn, which oxidizes vegetable oils and gives stock a stale, cardboard-like flavor. Press down on the vegetables each time you add a handful, then seal the container immediately. Date the outside of the container with a strip of masking tape and a marker. For the best flavor, aim to fill and simmer your scrap container within three to four months.
Core Vegetables That Build Deep Flavor
A balanced vegetable broth relies on aromatics that provide sweetness, savory depth, and pleasant aroma. The classic French mirepoix combination of onions, carrots, and celery serves as your primary framework. You want these three items to make up roughly two-thirds of the total volume of your scrap container. The remaining third can include herbs, fungi, and complementary root vegetables.
Yellow and red onion skins are particularly valuable because their papery outer layers release natural tannins that tint your broth a deep, appetizing amber. Leek greens, which are often discarded because of their tough texture, bring a gentle, buttery sweetness once simmered. Carrot skins and tops deliver earthy sugar, while celery leaves contain high concentrations of aromatic oils that brighten the overall profile. Button mushroom stems and shiitake trimmings contribute natural glutamates, which give vegetable broth a round, savory mouthfeel often missing from meatless stocks.
| Scrap Item | Primary Contribution | Best Proportion in Bag |
|---|---|---|
| Onion skins, ends, and leek tops | Golden color, base sweetness, and aromatic depth | Roughly 35 percent of total volume |
| Carrot peels, root tips, and clean stems | Earthy sweetness and body | Roughly 20 percent of total volume |
| Celery stalks, ribs, and leafy crowns | Salty minerals and herbal aroma | Roughly 15 percent of total volume |
| Mushroom stems and trimming scraps | Natural glutamates and savory umami depth | Roughly 15 percent of total volume |
| Herb stems (parsley, thyme, bay leaves) | Bright aromatic top notes | Roughly 15 percent of total volume |
Do not overlook soft herb stems. Parsley stems carry nearly as much flavor as the leaves without turning dark and muddy in hot water. Thyme sprigs, whole black peppercorns, and bruised garlic papery ends provide complex background warmth. You can also toss in clean parsnip peelings, fennel fronds in small amounts, and tomato skins or cores, which supply bright acidity.
Bitter Vegetables That Ruin Your Broth
The most common reason homemade scrap broth tastes disappointing is the indiscriminate addition of brassicas. Members of the cabbage family contain glucosinolates, sulfur-rich compounds that break down during prolonged cooking into volatile, bitter molecules. Adding even a cup of these scraps can make your entire stock pot smell like an overcooked school cafeteria.
- Brassicas: Keep broccoli stems, cauliflower cores, Brussels sprouts leaves, kale ribs, and cabbage trimmings out of the pot entirely.
- Starchy Peelings: Russet, red, or Yukon Gold potato skins leach excessive starch into the liquid, producing a murky, grayish broth with a chalky texture rather than a clear soup base.
- Nightshade Leaves and Green Spots: Tomato greens and green potato skins contain solanine, a bitter glycoalkaloid that is unpalatable and potentially toxic in large amounts.
- Artichoke Leaves and Asparagus Butts: Artichokes release cynarin, which imparts a cloying, metallic sweet-bitter flavor. Asparagus trimmings impart an overwhelmingly grassy, pungent aroma that overpowers delicate soups.
- Beets and Dark Beet Greens: While not bitter, even half a beet will dye your entire batch an intense, murky purple that ruins the presentation of sauces, risottos, and noodle bowls.
Bell pepper tops and seeds require caution as well. While sweet red pepper scraps can work in specialized chili or stew bases, everyday stocks benefit from staying neutral. Green bell pepper caps, in particular, release an astringent, grassy bitterness that lingers persistently on the back of the palate.
Simmering Times for Vegetable Stock Pots
Meat broths require four to twelve hours of low heat to break down dense collagen and connective tissues into gelatin. Vegetable scraps require a completely different approach. Plant cell walls soften quickly, releasing their aromatic water-soluble compounds within the first hour of heat exposure.
Transfer your frozen trimmings directly into a large stainless steel or enameled stock pot without thawing them first. Thawing on the counter causes vegetables to weep nutrient-rich liquid and lose cellular firmness. Measure the volume of your scraps and cover them with clean cold water until the water level sits about one inch above the packed vegetables. A dependable ratio is approximately 800 grams of frozen vegetables to 2.5 liters of cold water.
Bring the pot to a gentle boil over medium-high heat, then immediately drop the burner down to medium-low. You want an active simmer where small bubbles rise periodically to the surface, maintaining a water temperature around 185 to 200 degrees Fahrenheit. Do not let the pot roll in a turbulent boil, which emulsifies suspended particles and leaves you with an opaque, muddy liquid.
Simmer the mixture uncovered or partially covered for 45 to 60 minutes. Cooking past the 60-minute mark yields diminishing returns: the fresh, vibrant flavor compounds begin to dissipate, while delicate aromatic herbs turn bitter and limp vegetables dissolve into fine grit that proves difficult to strain out.
Straining, Cooling, and Safe Storage Methods
Once the simmering window closes, remove the pot from heat promptly. Leaving hot vegetables steeping in cooling water extracts off-flavors and softens the plant matter into mush.
Set a fine-mesh metal sieve over a wide heatproof bowl or another large pot. Pour the contents through the sieve in a steady stream. Resist the urge to press, mash, or squeeze the softened vegetables against the mesh with a wooden spoon. While squeezing forces out an extra tablespoon or two of liquid, it also pushes chalky particulate into your clear broth. Let gravity do the work for five minutes, then lift the strainer away.
Cooling your broth quickly is a vital food safety step. Warm liquid kept between 70 and 120 degrees Fahrenheit provides an ideal environment for bacterial growth. Follow these steps to lower the temperature rapidly:
- Set the bowl containing hot stock into a clean kitchen sink filled with cold water and ice cubes, ensuring the water line stays below the rim of the stock bowl.
- Stir the stock every five minutes to distribute heat evenly until the liquid cools below room temperature, ideally reaching 70 degrees Fahrenheit within two hours.
- Divide the cooled stock into shallow containers rather than one deep pot, which allows the refrigerator to cool the liquid down to 40 degrees Fahrenheit or lower quickly.
Refrigerated stock keeps well for four to five days. If you plan to freeze your broth, pour it into freezer-safe containers, leaving half an inch of room for ice expansion, and freeze for up to six months. Standard ice cube trays work well for recipes requiring only a splash of stock: freeze two-tablespoon portions, pop the cubes into a freezer bag, and retrieve them as needed.
If you consider shelf-stable canning, be aware that plain vegetable stock is a low-acid food. It cannot be safely preserved in a standard boiling water bath canner, which fails to reach the temperatures required to destroy bacterial spores. Shelf-stable canning of vegetable stock requires a calibrated pressure canner operated according to established extension guidelines. When in doubt, stick to freezing, which preserves delicate aromatic flavors far better anyway.
Using Spent Mash as Garden Compost
After your stock pot has given its all, you are left with a warm, damp heap of spent vegetable solids. While their culinary life is finished, their organic matter remains valuable for the soil. Simmering strips most sugars, starches, and water-soluble vitamins from the vegetables, leaving behind moist cellulose and insoluble fiber that break down easily in backyard compost piles.
Because the vegetables are already partially decomposed by heat, they break down faster than raw kitchen scraps. However, their high moisture content presents a composting risk. Dumping a hot, sodden mound of vegetable mash into your compost bin creates an anaerobic dead zone if it is left in a dense pile. Anaerobic pockets smell foul and slow down the aerobic microbes responsible for sweet-smelling, rich garden compost.
To incorporate spent mash effectively, let it cool completely. Then, mix it thoroughly into an equal or greater volume of dry, carbon-rich brown materials, such as shredded dry autumn leaves, torn cardboard, or clean straw. This balances the wet nitrogen-rich vegetables with dry structure, ensuring adequate airflow through the heap. If you practice indoor vermicomposting, offer spent mash to your worm bin only in modest amounts, as dense cooked alliums like onion scraps can take longer for worms to process and can cause localized acidity swings if overfed.
Common Mistakes to Avoid
Stock making is forgiving, but several recurring errors can undercut your efforts before the pot ever reaches the stove:
- Over-salting the initial pot: Never salt scrap stock while it simmers. As the broth reduces during cooking or when used later in sauces and soups, salt concentrates rapidly. Keep the stock unsalted until you use it in a final dish.
- Adding dusty root trimmings: Potato skins, beet bottoms, or gritty carrot tips that carry soil will leave mineral grit at the bottom of your soup. Rinse every scrap before it touches the freezer bag.
- Boiling too aggressively: A rapid, rolling boil breaks vegetable matter into microscopic flecks that pass through even fine strainers, resulting in dull, cloudy broth.
- Hoarding scraps indefinitely: Scraps left in the freezer for more than six months develop ice crystals and lose aromatic potency. Treat your freezer scrap bag as active inventory, not a vegetable museum.
Practical Next Steps for Your Next Batch
Set aside a clean gallon container or silicone bag in your freezer before your next meal preparation. As you slice through this week's meals, drop in the papery skins of your yellow onions, the pale green tops of your leeks, and the trimmed ends of your carrots and celery ribs. Skip the broccoli stems and wipe down any visible dirt on your cutting board before sweeping the trimmings into the bag.
Once the container feels full and firmly packed, set aside an hour on a weekend afternoon. Tip the frozen block into your stock pot, cover it with cold tap water, and bring it to a gentle, quiet simmer. In less than an hour, you will have a fragrant, homemade vegetable base that costs virtually nothing and keeps kitchen waste out of the local landfill.