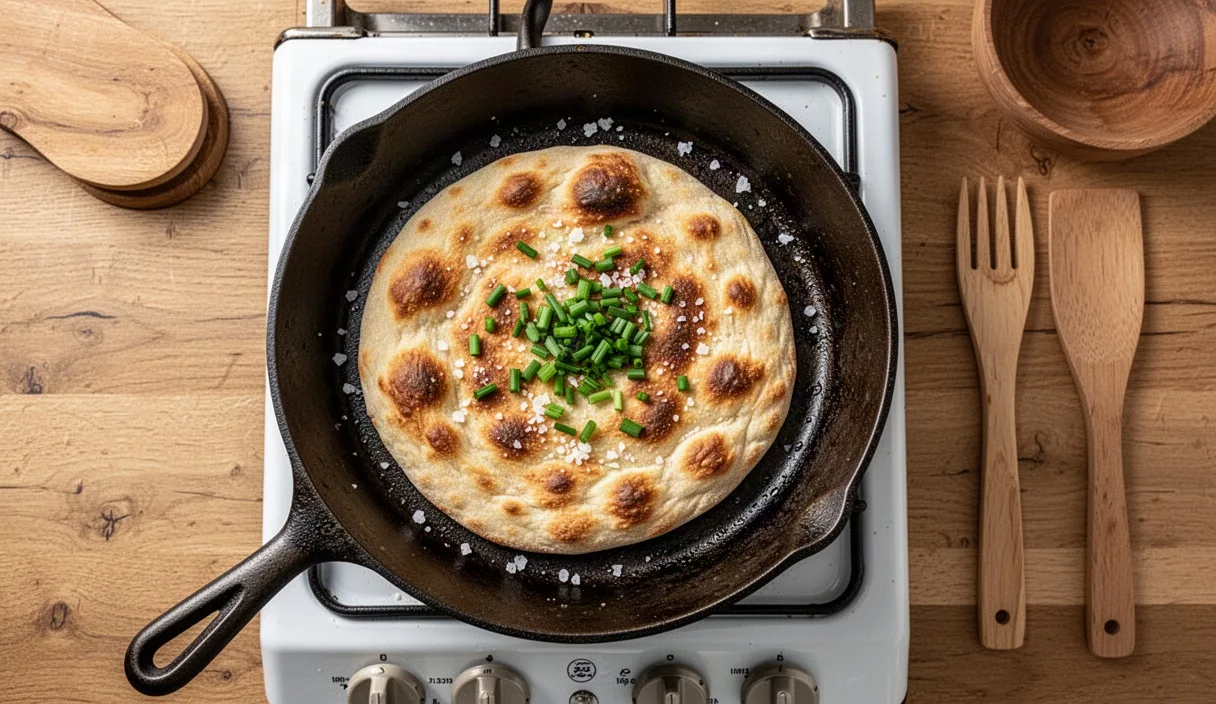

A jar of sourdough discard sitting in the refrigerator often presents a quiet domestic dilemma. Throwing flour and water into the compost feels wasteful, yet mixing another full loaf of hearth bread requires hours of stretching, folding, and waiting that a weekday evening rarely accommodates. Pouring unfed starter straight into a screaming-hot cast-iron skillet solves this problem in under ten minutes, turning what looks like graying paste into a blistered, chewy flatbread with crisp lacy rims.
This technique relies on the natural hydration of a standard starter, which typically sits at equal parts flour and water by weight. Because the gluten has already broken down somewhat during fermentation, the batter behaves more like a crumpet or an unsweetened pancake batter than a stiff dough. With the right heat management and seasoning, you get pockets of steam, deep browning, and a pleasant tang that pairs cleanly with soups, curries, or a simple fried egg.
Checking Discard Acidity Before Cooking
Before you pour starter into a hot skillet, assess how long it has been sitting neglected. Fresh discard from yesterday's feeding smells pleasantly of yogurt, ripe apples, or light beer. Discard that has lingered in the back of the fridge for three weeks often develops a dark liquid on top known as hooch, accompanied by an intense aroma of vinegar or acetone. While hooch is harmless, starter that smells sharply of solvent will produce a flatbread with a harsh, puckering sourness that overwhelms any toppings.
If your discard has a thin layer of hooch, pour it off down the sink rather than stirring it back in. Give the remaining starter a vigorous stir with a fork to homogenize the flour and liquid. For starter that has been refrigerated between three and seven days, the balance of lactic and acetic acid usually yields the best flavor. If the discard has aged past two weeks, it has likely degraded too much gluten to hold steam bubbles effectively, meaning your flatbread will turn out dense and gummy rather than aerated.
You can quickly evaluate the state of your discard using this simple sensory guide before heating the pan:
| Age of Discard | Aroma and Surface | Texture | Best Action |
|---|---|---|---|
| 1 to 3 days | Sweet, yeasty, mild dairy | Bubbly, stretchy, thick | Use directly without modification |
| 4 to 8 days | Tart yogurt, sharp cider | Loose, soft, slightly runny | Stir well, balance with a pinch of baking soda |
| 9 to 14 days | Strong vinegar, grey surface | Watery, stringy, fragile | Pour off liquid, add a spoonful of fresh flour |
| Over 15 days | Acetone, nail polish remover | Separated, lifeless | Feed once to revive before cooking |
When working with older, strongly acidic discard, whisking in an eighth of a teaspoon of baking soda per 120 grams of batter works wonders. The alkaline soda neutralizes excess acetic acid while reacting instantly to create carbon dioxide. This provides an immediate lift the moment the batter hits the hot metal, resulting in a lighter crumb.
Seasoning the Starter with Herbs and Salt
Unseasoned starter poured onto heat tastes sour, starchy, and remarkably dull. Sourdough discard requires more salt than many cooks expect because fermentation dulls our perception of sodium. For every 120 grams of discard (roughly half a metric cup), whisk in two grams of fine sea salt, which equates to slightly less than half a level teaspoon. This single addition transforms the batter from paste to bread.
Herbs and spices should be mixed directly into the batter or sprinkled immediately onto the wet surface before flipping. Delicate fresh herbs like dill, cilantro, or parsley scorch if exposed to direct cast iron for longer than thirty seconds. Sturdier additions, such as thinly sliced scallions, chopped rosemary, nigella seeds, or toasted sesame seeds, hold up beautifully against dry heat and release their aromatic oils into the browning crust.
- Finely chopped scallions: Stir two tablespoons into the batter for a savory, Chinese scallion pancake profile.
- Whole seeds: Sprinkle half a teaspoon of nigella, cumin, or white sesame seeds over the top while the first side cooks so they embed in the wet dough.
- Za'atar or dried oregano: Whisk one teaspoon directly into the cold batter so the herbs hydrate before hitting the pan.
- Grated hard cheese: Scatter a tablespoon of finely grated Parmesan or aged pecorino across the uncooked top just before flipping to create a golden frico crust.
Keep the batter consistency in mind when adding mix-ins. If your discard is very thick because of whole-wheat or rye flour, whisk in a single teaspoon of room-temperature water so the batter spreads under its own weight to roughly a quarter-inch thickness in the pan. If the batter is too thick, the exterior burns before the wet core sets.
Preheating Cast Iron for Even Blistering
Cast iron is an exceptional reservoir of thermal energy, but it conducts heat unevenly across its surface. Placing a cold skillet over high heat produces a blazing hotspot right above the burner ring while the outer edges remain cool. To achieve the leopard-spotted char that characterizes good flatbread, place your ten-inch or twelve-inch skillet over medium-low heat for roughly eight to ten minutes before adding any fat.
Test the surface temperature by flicking a few droplets of water into the center. If the water simply sits and steams, the pan is too cold. If it instantly explodes into microscopic vapor, the pan is too hot and will scorch the discard into bitter carbon. You want the water drops to dance and skitter across the iron in tight spheres before vanishing, which indicates a surface temperature hovering around 200 to 220 degrees Celsius (about 400 to 425 degrees Fahrenheit).
Once the pan reaches temperature, add your cooking fat. Use an oil with a high smoke point, such as refined avocado oil, clarified butter (ghee), or standard vegetable oil. Extra virgin olive oil can burn and turn acrid at these temperatures. Add one teaspoon of oil and use a silicone brush or folded paper towel held with tongs to spread a glossy, micro-thin film over the entire cooking floor and lower walls of the skillet.
Do not let oil pool in puddles. Excess oil fries the batter like a funnel cake, which creates an unpleasant greasy chew instead of the dry, blistered blister-and-char texture typical of naan or pita. The iron should look wet and reflective, not deep with grease.
Flipping the Batter for Crisp Edges
Pour roughly 100 to 120 grams of seasoned starter directly into the center of the preheated pan. If the batter does not settle naturally, use the back of a metal ladle or spoon to spiral it outward until it forms a circle roughly six to seven inches in diameter. You should immediately hear a quiet, steady sizzle rather than a violent roar.
Now, leave it alone. The most common error is attempting to move, lift, or nudge the batter before the starch molecules have set and released from the iron. Within sixty seconds, steam bubbles will push through the surface, mirroring the texture of an English muffin or crumpet. If you prefer a softer, steam-baked interior, place a metal lid or an inverted baking sheet over the skillet for the first two minutes of cooking.
- Watch for surface dullness: Cook undisturbed for two to three minutes until the rim turns matte and the surface bubbles pop without liquid batter filling them back in.
- Loosen the perimeter: Slide a thin, flexible metal spatula (such as a fish spatula) gently around the circumference to test for release. The crust should release cleanly without tearing.
- Execute the flip: Drive the spatula decisively beneath the center and flip the flatbread in one smooth movement.
- Press down lightly: Use the flat face of the spatula to press the newly exposed surface against the iron, ensuring maximum contact across the entire bottom.
- Finish the cook: Allow the second side to cook for ninety seconds to two minutes until deep brown spots form across the underside.
The second side cooks faster than the first because the steam within the bread has already expanded the dough matrix. Check the bottom by lifting one edge with your spatula. Once you see rich walnut-brown mottling and the edges feel firm to the touch, transfer the flatbread immediately to a wire cooling rack.
Finishing with Garlic Oil or Flaky Salt
The twenty seconds directly after the flatbread leaves the pan represent the critical seasoning window. The surface remains hot enough to flash-melt fats and absorb aromatics without softening the crisp outer shell. Never brush cold butter or heavy, water-rich sauces onto the bread while it sits in the pan, as this steams away the crispness you just worked to build.
Prepare an aromatic fat while the bread cooks. Gently warm two tablespoons of neutral oil or melted butter in a small saucepan with a grated clove of garlic, a pinch of chili flakes, and finely minced parsley. Avoid browning the garlic; let it infuse over low heat just until fragrant. The moment the flatbread lands on the cooling rack, brush a thin layer of this warm oil across the top side.
Immediately follow the oil with a light pinch of coarse or flaky sea salt. The large crystal structure provides a sharp, textural crunch that cuts through the fermented density of the flatbread. If you added savory seeds to the batter, a squeeze of fresh lemon juice over the warm oil balances the nutty bitterness of toasted sesame or nigella.
If you prefer a sweet breakfast flatbread, skip the garlic. Instead, brush the hot bread with melted unsalted butter, dust with ground cinnamon, and drizzle with a teaspoon of dark buckwheat honey or maple syrup. Sourdough discard made from whole grain flours has a natural earthy tang that pairs exceptionally well with rich, resinous honeys.
Storing Leftover Discard Breads for Reheating
Flatbreads made from discard lack the structural resilience of slowly fermented, gluten-developed sourdough loaves. If left uncovered at room temperature, they turn leathery within three hours as moisture migrates from the crumb into the crust. Conversely, sealing them in plastic while still warm traps steam, reducing that crisp cast-iron exterior to limp, soggy dough.
Allow the flatbreads to cool completely on a wire rack until they reach room temperature throughout, which takes roughly fifteen minutes. Once cool, stack them between sheets of parchment paper. The paper prevents the oiled surfaces from adhering to one another and makes it simple to pull a single portion from the batch later.
- Short-term counter storage: Wrap the parchment-separated stack in a clean cotton kitchen towel and place it inside a bread box or paper bag. Use within twenty-four hours.
- Refrigeration: Avoid the refrigerator. The temperature range of four degrees Celsius accelerates starch retrogradation, making the flatbread stale faster than room temperature storage.
- Freezer storage: Slide the parchment-separated stack into a heavy-duty zip-top freezer bag, squeeze out excess air, and freeze flat. They keep well for up to two months without noticeable flavor loss.
To reheat frozen or room-temperature flatbreads, never reach for the microwave. Microwave heating excites water molecules rapidly, transforming the starches into a rubbery mass that hardens into cardboard as it cools. Instead, drop the flatbread directly into a dry, preheated skillet over medium heat for sixty seconds per side, or place it directly onto the rack of a toaster oven set to 190 degrees Celsius for three minutes. The crust will snap back to its original crisp state while the interior stays tender.
Common Mistakes
Working with discard flatbread is simple, but small oversights can lead to disappointing results. The most frequent error is pouring batter that is far too cold. Starter pulled straight from a four-degree refrigerator drops the temperature of the cast iron instantly, causing the oil to soak into the batter rather than frying the exterior. Let your discard sit on the counter for twenty minutes before cooking, or whisk in a tablespoon of lukewarm water to take the chill off.
Another common misstep is using excess fat in the pan. A cast-iron skillet requires only a microscopic barrier of oil. If the batter slides around like a skate on an ice rink, you have used too much fat. The flatbread needs to grip the metal microscopic pores slightly so the batter stretches outward as steam bubbles inflate the interior.
Finally, cooks often pour the batter too thick. A flatbread poured to a half-inch depth cannot cook through to the center before the outside chars. Aim for a depth between five and seven millimeters. If your starter is exceptionally thick due to a high proportion of rye or whole-wheat flour, spread it outward with a spoon immediately upon pouring.
Next Steps in Your Kitchen
To build this technique into your weekly routine, keep a designated jar in your refrigerator for cooking discard, separate from your primary sourdough mother. Each time you feed your main culture, deposit the unfed portion into this working jar. Once the jar accumulates roughly 250 grams, you have enough material to cook two substantial flatbreads to accompany dinner.
Start by testing a single, unadorned flatbread with just salt and oil to gauge how your specific starter hydration and cast-iron pan interact over your stove's burners. Once you have dialed in the exact heat setting that produces blistering without burning, begin experimenting with folded-in herbs, spice blends, and aromatic finishing oils.