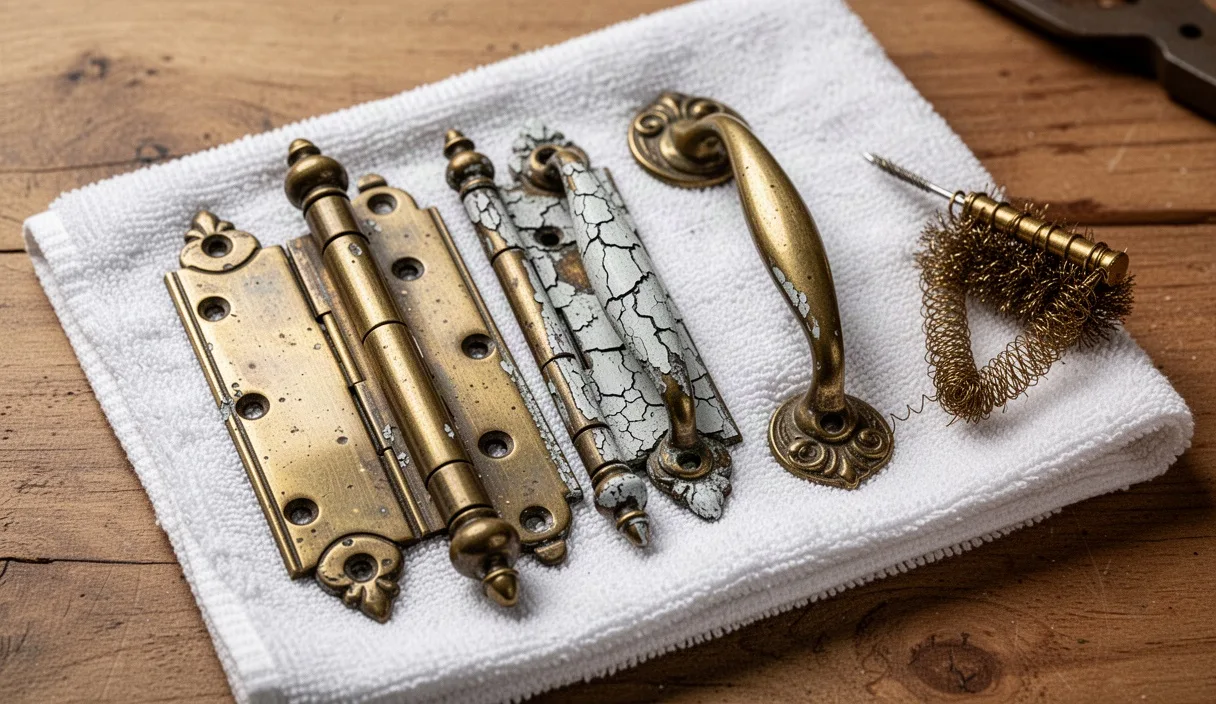

Few architectural features survive thirty coats of paint as well as old metal hardware, yet few tasks look as miserable as scraping those details by hand. Traditional solvent strippers work, but they bring harsh fumes, chemical burns, and sticky waste that clings to scrapers and fingers alike. In historic homes built before 1978, those thick layers almost certainly hide lead paint, meaning that dry scraping or heat guns introduce toxic dust and dangerous vapor directly into your living space. If you suspect heavy lead contamination, consulting a certified lead remediation professional is always the safest course.
Fortunately, you do not need toxic chemicals to strip solid brass backplates, cast iron hinges, or steel mortise locks. A slow cooker, plain tap water, and a squirt of liquid dish soap do the heavy lifting through gentle, sustained heat. The warm water breaks the mechanical bond between the metal and the paint film, causing decades of oil-based enamel, latex, and primer to soften into a skin that slides off like wet pasta. It takes patience rather than elbow grease, and it leaves your workshop completely free of noxious vapors.
Setting Up a Dedicated Salvage Crock Pot
The primary rule of cooking hardware is absolute: once an appliance holds hardware, it never holds food again. Even if you scrub the ceramic crock with pumice, trace amounts of lead, antimony, and zinc linger in the microscopic crazing of the glaze. Visit a local thrift store or garage sale and pick up a secondhand slow cooker with a four-quart to six-quart capacity. You can usually find one for under fifteen dollars. A removable ceramic crock is ideal because it makes rinsing and disposing of sludge much easier, but an older one-piece unit works if you handle it carefully.
Place your dedicated salvage cooker in a well-ventilated garage, covered porch, or workshop bench next to an outlet. Even without chemical strippers, boiling sixty years of old linseed oil, varnish, and household grime releases a stale, musty odor that smells like an attic that has not been opened since 1924. Setting up near a ground-fault circuit interrupter (GFCI) outlet protects you against accidental water spills. Keep the cooker away from edges where children or pets might snag the power cord.
Line your work area before you pour a single drop of water. Place a heavy rubber work mat or three layers of thick brown craft paper across the workbench to catch wet drips. Next to the pot, position a plastic tub filled with cold tap water for quenching parts, a collection bucket lined with an old cotton rag to catch wet paint skins, and your protective gear. Heavy rubber gloves, safety glasses, and an apron will keep dirty, lead-bearing sludge off your skin and clothes.
Submerging Metal Hardware with Mild Soap
Before dropping anything into the pot, verify what your hardware is actually made of. Solid brass, bronze, forged iron, and stamped steel handle this thermal water bath effortlessly. Die-cast pot metal and thin pot-metal replicas from the late twentieth century can warp or crack if heated and cooled rapidly, and plated zinc parts may lose their thin flash plating. Test your parts with a small kitchen magnet: if the magnet sticks firmly, you have cast iron or steel. If it does not stick, you are likely holding solid brass, bronze, or copper.
Arrange your hardware in the bottom of the crock in a loose, single layer where possible. Do not cram twenty mortise locks into a small pot at once. Overcrowding blocks the hot water from reaching the inner screw recesses and binds pieces together as the paint softens. For large architectural batches, strip the components room by room, keeping small screws, strike plates, and hinge leaves grouped together so you do not spend an afternoon matching orphan parts.
Fill the pot with warm water until the highest piece of hardware sits under at least two inches of water. Add two tablespoons of standard liquid dishwashing soap. The dish soap acts as a surfactant, lowering the surface tension of the water so it penetrates underneath curled paint edges and lifts old grease. Some salvage restorers use liquid laundry detergent or washing soda, but standard dish soap remains the gentlest choice because it will not discolor copper alloys or pit softer metals during an extended soak.
Monitoring Heat Levels to Loosen Paint Layers
Cover the pot with its lid, switch the dial to the low setting, and let the thermal process work. Your goal is not a rolling boil, which creates turbulent steam and sloshes dirty water against the lid, but a steady, sub-simmering heat between 160 and 190 degrees Fahrenheit. At this temperature, oil and latex binders expand at a rate different from the underlying brass or iron. This unequal expansion shears the paint away from the metal pores without baking the residue into an unmanageable paste.
Leave the hardware in the hot bath for four to six hours. If the pieces carry five or more coats of milk paint or hardened oil enamel, an overnight soak of eight to ten hours works best. Check the liquid level every two hours if you are working during the day. If the water evaporates down toward the tops of the metal pieces, pour in additional hot tap water to keep everything submerged. Exposed metal will cool down, causing the loosened paint to dry and re-harden onto the surface like concrete.
| Metal Type | Recommended Temperature | Average Soak Time | Primary Risk |
|---|---|---|---|
| Solid Cast Brass | Low setting (160-180 F) | 4 to 8 hours | Discoloration if water completely evaporates |
| Wrought or Cast Iron | High setting (180-200 F) | 6 to 10 hours | Flash rust if left exposed to air while hot |
| Plated Steel | Low setting (160-170 F) | 3 to 5 hours | Delamination of worn plating underneath paint |
| Stamped Copper | Low setting (150-170 F) | 3 to 6 hours | Surface darkening from sulfur in old paints |
You can tell the hardware is ready when the paint layers begin to look like wrinkled, blistered skin. Lift the lid with tongs and use a wooden stir stick or bamboo skewer to poke a flat area of the largest piece. If the paint slides away under minimal pressure to expose bare metal underneath, it is time to scrub. Leave the cooker switched on while you work through the batch so remaining parts stay warm and pliable.
Scrubbing Detail Grooves with Non-Marring Brushes
Never pull out all the hardware at once. Reach into the pot with steel tongs, pull a single item out, and move it immediately to your work surface. If the piece cools down in room air for more than two minutes, the softened paint will tack up and stick to the surface again. Keep a spray bottle of warm water on your bench to keep the piece damp while you scrub.
Use the softest brush that effectively removes the paint to avoid scratching the original factory milling or casting marks. Natural horsehair brushes, stiff nylon utility brushes, and soft brass wire brushes are your best tools. Steel wire brushes or rotary wire wheels mounted on drills will gouge soft brass, round off crisp Victorian casting details, and leave microscopic grooves that catch future dirt. Hold the piece steady on your mat and scrub with firm, circular strokes.
Deep screw threads, slotted screw heads, and recessed filigree require targeted tools. A wooden toothpick or a trimmed bamboo skewer works better than an awl because the wood compresses without scoring antique metal. Push the wood point directly into screw slots to push out the paint cylinder in one piece. For intricate floral borders on Eastlake or Art Nouveau backplates, cut the bristles of a cheap nylon toothbrush down to half their length to increase their stiffness without increasing their abrasiveness.
Neutralizing and Drying Clean Metal Pieces
Once the paint is off, you will see a murky layer of grey oxidation, softened grime, and soap film on the metal. Submerge the cleaned piece immediately into your rinse bucket of clean, warm water. Swish it around to wash away loose flakes. If you are cleaning raw steel or cast iron, flash rust can begin to form within sixty seconds of leaving the rinse water. To prevent this, pull the iron part out and dry it instantly with a lint-free cotton towel, then run a warm hairdryer over the recesses to drive out hidden moisture.
Brass and bronze handle moisture better than iron, but they are vulnerable to staining if water drops pool on their faces. Lay the cleaned copper-alloy parts flat on a dry towel and wipe them thoroughly. At this stage, historic brass will not look shiny and modern; it will have an uneven, aged patina ranging from dull olive brown to dark mustard. That mellow look is genuine age, built up over eighty to one hundred years of air exposure beneath the paint film.
If you prefer a lighter, more uniform bronze glow without removing the underlying patina, mix a tablespoon of baking soda into warm water and wipe the metal with a soft microfibre cloth. This lifts surface grime without stripping the dark contrast sitting down in the low relief points. If you want high-polish bright brass, apply a non-ammoniated metal polish with cotton flannel. Avoid ammonia-based pastes on antique brass, as ammonia can cause stress-corrosion cracking along vintage stress points and threaded holes.
Protecting Restored Brass with Mineral Wax
Freshly stripped metal is completely porous and unprotected against oxygen, human skin oils, and ambient moisture. Without a seal, unlacquered brass turns dull and splotchy within three weeks, while stripped iron begins to rust along handled edges. Spray lacquers were historically applied to some late nineteenth-century hardware, but lacquer can orange-peel, chip, and peel over time, leaving you with another stripping chore five years down the road.
Microcrystalline wax, originally developed for museum conservation, is the finest protective barrier for historic architectural metal. Unlike carnauba paste waxes or standard furniture waxes, microcrystalline wax contains no plant acids, does not yellow with age, and has a higher melting point, meaning it will not smudge under the heat of a hand turning a doorknob. Renowned restoration brands like Renaissance Wax create an inert, moisture-resistant barrier that remains completely reversible with mineral spirits.
Apply the wax systematically to guarantee lasting protection:
- Warm the metal slightly with a hairdryer on low heat until the piece feels warm to the touch, which helps the wax flow smoothly into cast crevices.
- Pick up a fingernail-sized dab of microcrystalline wax on a clean, lint-free cotton rag.
- Spread the wax across the entire piece in a thin, uniform film, making sure to work it into screw heads, keyholes, and backplate recesses.
- Allow the wax to dry to a hazy, matte film for roughly twenty minutes at room temperature.
- Buff the surface firmly with a clean cotton flannel cloth or horsehair shoe-shine brush until a hard, silky luster appears.
- Apply a second thin coat on high-touch surfaces such as door knobs and pull handles to provide an extra layer of wear resistance.
Common Mistakes
The most frequent error is rushing the water bath. If you pull hardware out after thirty minutes because the top layer of paint looks soft, the lower coats will remain rock-hard, forcing you to scrape aggressively and risk damaging the metal. Give the slow cooker the time it needs to hydrate every layer down to the original substrate.
Another regular mistake is discarding paint-laden water directly down the household drain. Plumbing traps will quickly clog with heavy paint skins, and municipal wastewater systems should not receive concentrated lead paint solids. Pour the cooled sludge through an old cotton pillowcase or multiple coffee filters suspended over a bucket. The clean water can then be disposed of, while the solid paint waste is left to dry completely in the rag before disposal according to local hazardous waste guidelines.
Finally, avoid wire wheels on electric bench grinders. It is tempting to buzz away years of paint in thirty seconds, but grinder wires run at three thousand revolutions per minute. They strip the original crisp edges off hardware, permanently soften fine details, and spit tiny brass fragments across the room. Thermal soaking takes longer on the clock, but your hands are only working for a few minutes per piece.
Next Steps for Your Hardware
With your hardware stripped, dried, and waxed, take a few practical steps before reinstalling it on doors and windows. Inspect the mechanical fasteners. Antique wood screws often have off-center single slots and hand-cut threads that match the original mortises. If the screw heads are clogged, clear them individually with a brass wire brush and apply a rub of beeswax to the threads to ensure they drive into century-old wood without snapping.
If you are restoring mortise locks, remove the single side-plate screw to open the case before re-hanging. Vacuum out the dried lint, check that the internal leaf springs are unbroken, and apply a small dab of white lithium grease or graphite powder to the sliding latch bolt and tumbler pivots. Reassemble the lock case, mount the escutcheons using their original screw patterns, and enjoy crisp, clean architectural details that operate smoothly without a trace of chemical fumes in your home.